10 HVAC Repair Guide Steps to Master Home Comfort Troubleshooting
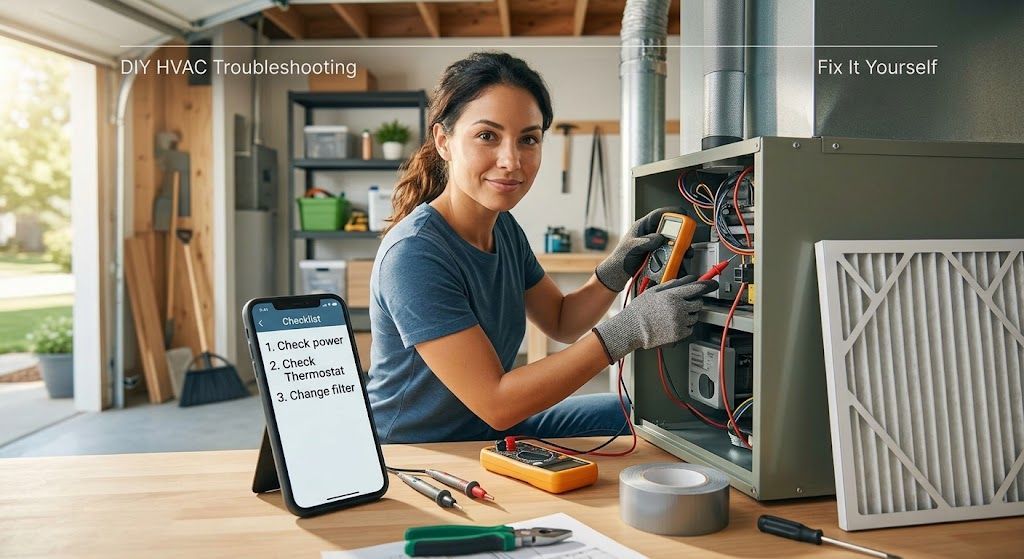
Keeping your home indoor climate comfortable, energy-efficient, and safe requires a clear understanding of how your heating, ventilation, and air conditioning system operates. When a sudden system malfunction happens, knowing how to approach HVAC repair can save you significant time, money, and stress. This complete guide walks you through essential diagnostic steps, maintenance procedures, and troubleshooting methods every homeowner should know before calling in professional service.
Understanding the Fundamentals of Household HVAC Repair
Every residential climate control system relies on three interconnected sub-systems: heating, cooling, and air delivery. When any single component experiences wear or mechanical failure, the entire balance of your home climate suffers.
Understanding how air flows through filter assemblies, across evaporator coils, and into room supply registers gives you a reliable baseline for effective HVAC repair diagnostics.
Most modern setups utilize a forced-air design. The central air handler draws air from your living spaces, passes it through a central filter, conditions it via a cooling evaporator or heating heat exchanger, and distributes it back into your rooms through structured ductwork. When something goes wrong with temperature regulation, airflow volume, or mechanical sounds, following a systematic protocol ensures you do not overlook easy fixes.
Step 1: Check Power Supplies and Safety Switches
Before assuming a complete component breakdown, check the main power supply feeding your indoor and outdoor units. Electric air handlers, furnaces, and outdoor condensing units consume substantial electric current, which means minor power surges or electrical load spikes can easily trip localized circuit breakers.
- Locate your main electrical breaker panel.
- Identify the dedicated breakers labeled for your air conditioner, furnace, or heat pump.
- Look for switches sitting in a neutral or mid-way position between ON and OFF.
- Firmly switch tripped breakers to the full OFF position before resetting them back to ON.
- Inspect the emergency disconnect switch mounted near your outdoor condenser unit.
Additionally, modern high-efficiency heating and cooling equipment includes float safety switches inside the condensate drain pan. If condensation backs up, this safety switch cuts power automatically to prevent overflow water damage. Resolving this safety trip is a crucial early check during initial HVAC repair steps.
Step 2: Calibrate and Inspect Thermostat Functionality
A surprising percentage of service calls stem from thermostat setting errors, dead control batteries, or sensor drift. The thermostat serves as the command brain for your entire setup. If signal transmission fails, your cooling or heating system will not respond properly.
- Battery Replacement: Swap out old AAA or AA batteries annually to prevent weak signal output.
- Cleaning Internal Contacts: Dust accumulative build-up inside mechanical or older digital thermostats can insulate temperature sensors and create inaccurate room readings. Gently remove the faceplate and use soft canned air to remove dust.
- Mode Verification: Confirm the system mode selection switch is explicitly set to COOL or HEAT rather than OFF or FAN ONLY.
- Setpoint Adjustments: Set your desired target temperature at least 5 degrees lower than room temperature during cooling tests, or 5 degrees higher during heating tests.
If your thermostat screen remains blank despite installing fresh batteries, check the low-voltage wiring connections behind the mounting plate. A blown 3-amp or 5-amp fuse on the furnace control board can interrupt transformer power to the thermostat, making fuse testing a vital part of routine HVAC repair evaluation.
Step 3: Inspect Air Filter Restrictions and Replace Clogged Media
Unrestricted airflow is essential for proper refrigeration cycles and heat transfer. A clogged filter restricts return air volume, leading directly to evaporator coil icing in summer or limit-switch tripping in winter.
When return air volume drops, the reduced heat exchange causes refrigerant temperatures inside the indoor evaporator coil to plunge below freezing. Moisture pulled from room air freezes onto the coil fins, restricting airflow further until the system stops cooling altogether. Checking and replacing air filters every 30 to 90 days prevents premature component damage and avoids unnecessary HVAC repair expenses.
Step 4: Clear Condensate Drain Lines and Trap Assemblies
High humidity environments generate gallons of condensation daily during summer cooling. This water collects in a drain pan beneath the indoor evaporator coil and flows out through a PVC drain line. Over time, algae, dirt, and microbial growth form blockages inside the trap.
To maintain free-flowing drainage:
- Locate the access T-pipe cap on your PVC condensate line near the air handler.
- Remove the cap and inspect for standing, stagnant water.
- Pour one cup of plain warm water mixed with mild dish soap down the drain line to clear light buildup.
- Use a wet/dry shop vacuum attached to the exterior drain line termination outside your home to pull stubborn clogs through.
- Consider installing inline pan treatment tablets to prevent future microbial growth.
Clearing condensate lines protects your ceilings, walls, and flooring from expensive water damage while keeping your system running smoothly.
Step 5: Clean Outdoor Condenser Coils and Free Air Flow Clearance
Your outdoor unit houses the compressor and condenser coil, which release heat extracted from inside your home out into the ambient outdoor air. When lawn clippings, dirt, leaves, or pollen coat the delicate aluminum fins on the outdoor coil, heat transfer drops dramatically.
This thermal buildup forces the compressor to operate under elevated pressure and higher electrical amp draws. Over time, dirty condenser coils cause thermal overload trips, premature compressor failure, and sky-high utility bills.
To safely clean your outdoor coil:
- Shut off power to the outdoor unit at the local disconnect box.
- Trim back shrubs, weeds, and tree branches to maintain at least 2 feet of clear space around the entire perimeter.
- Use a garden hose with a standard spray nozzle directed downward at a 45-degree angle to flush debris out from the metal fins. Never use high-pressure power washers, which bend soft aluminum coil fins instantly.
Adding coil inspection and washing to your seasonal home maintenance list lowers the risk of unexpected breakdown calls.
Step 6: Identify Unusual System Noises and Mechanical Symptoms
Strange noises coming from your heating or air conditioning system offer valuable clues regarding underlying mechanical issues. Learning to decode these sounds helps you address problems before minor wear turns into major failure.
Step 7: Check Ductwork Integrity and Airflow Balancing
Even when your central heating and cooling equipment runs properly, leaky or damaged air ducts prevent conditioned air from reaching your living spaces efficiently. Unsealed duct joints, loose flex-duct connections, or crushed lines allow cold or warm air to escape into unconditioned attics and crawlspaces.
- Visual Duct Inspection: Look for visible disconnects, fallen duct runs, or torn outer foil insulation in accessible attic or basement areas.
- Sealing Air Leaks: Use professional-grade mastic sealant or aluminum foil tape across metal-to-metal duct joints. Avoid standard cloth duct tape, which degrades quickly under temperature changes.
- Balancing Supply Registers: Ensure all interior supply vents and return air grilles remain open and unblocked by furniture, drapes, or rugs. Closing off more than 20 percent of a home's registers increases internal static pressure, straining the blower motor.
Optimizing duct airflow improves room-to-room temperature balance and lowers overall wear on system components.
Step 8: Understand Electrical Capacitors and Contactors
Start capacitors, run capacitors, and contactor switches are among the most frequently replaced parts in central air systems. Capacitors act like temporary electrical storage units, supplying the voltage boost needed to start heavy electric motors and keep them running steadily.
Over time, high summer heat and electrical surges degrade internal capacitor materials. A failing capacitor often causes the outdoor fan or compressor to hum without starting, eventually tripping the breaker. Likewise, contactor electrical points pit and burn from constant high-voltage arc flashes, preventing current from reaching vital motors.
Because motor capacitors store high voltages even with power disconnected, homeowners must practice extreme caution. Unless you are comfortable using an insulated multimeter and discharging electrical storage safely, component replacements are best handled by trained technicians.
Step 9: Seasonal Preventive Care vs. Emergency Fixes
Taking a proactive approach to equipment maintenance helps you avoid emergency system failures during extreme summer heatwaves or winter cold snaps. Scheduling professional inspections twice a year—once in spring for cooling and once in fall for heating—keeps all components operating at peak efficiency.
Routine maintenance includes comprehensive system checks:
- Checking refrigerant pressure levels and superheat/subcooling calculations.
- Tightening electrical terminal screws and verifying control wiring integrity.
- Testing furnace flame sensors, ignition controls, and heat exchanger safety limits.
- Inspecting blower motor assemblies and checking fan wheel balances.
- Measuring total operating current draw against original equipment rating plates.
Regular tune-ups extend system lifespan, preserve manufacturer warranties, and reduce monthly energy usage.
Step 10: Knowing When to Call a Certified Professional
While checking filters, resetting circuit breakers, and cleaning outdoor coils are great DIY tasks, certain complex issues require specialized tools and EPA certifications. Refrigerant leaks, high-voltage electrical failures, cracked heat exchangers, and complex circuit board diagnostics should always be handled by qualified service specialists.
If your system requires technical service, refrigerant recovery, or full system diagnosis, turn to the licensed professionals at Total Air Inc for fast, reliable HVAC repair tailored to your home's unique comfort needs. Working with experienced technicians ensures every step is completed safely, correctly, and according to strict industry standards.
Frequently Asked Questions
How often should I replace my HVAC air filter?
Standard 1-inch fiberglass filters should be checked monthly and replaced every 30 to 60 days. Thicker 4-inch to 5-inch pleated media filters can last 6 to 12 months depending on household pet levels, allergy needs, and overall usage patterns.
Why is my air conditioner running continuously without cooling?
Continuous operation usually points to restricted airflow from a dirty air filter, a frozen evaporator coil, an outdoor coil coated in dirt, or a low refrigerant charge due to an undetected leak.
How can I tell if my system is low on refrigerant?
Key warning signs of low refrigerant include reduced air velocity from vents, warmer air discharge during cooling modes, ice buildup along copper line sets, and continuous gurgling or bubbling noises near the indoor coil.
What is the average lifespan of a central HVAC unit?
With regular routine maintenance, high-quality central air conditioners and heat pumps typically last between 12 and 15 years. Gas furnaces often operate reliably for 15 to 20 years when properly cared for.